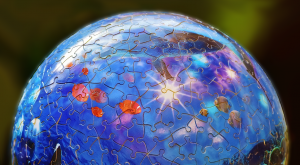
The Ecampus multimedia team creates animations to bring your thoughts and words to life. In virtual reality, creating these 3D objects and animations has become incredibly easy and fast.

The old ways … of power tool juggling

Developing “multimedia” often means using small aspects of many different tools. “Media” being a means of communication and the plural of medium: a means of doing something. To create an animation for your class, we quickly run through a long list of media.

Here’s an exhaustive run through of how the process works at the moment (feel free to skip to the next section! This is detailed): You would typically type up and email over a script that I take into Google Drive to edit and comment upon. You’d record audio in one of our sound booths, and I’d take the resulting sound files into Adobe Audition to equalize levels and remove background noise(s). Then I’d grab a pencil and sketch out a quick storyboard for each sentence to suggest visuals that could emphasize your point(s). Photographs of these sketches are edited in Photoshop and injected into another file on Google Drive.

And that is just the easy preparation portion. Depending on the animation style we’re going after, I’d dive deep into obscure programs I’ve learned to use over the past few decades – like Autodesk Maya / Mudbox / MotionBuilder / Meshmixer, Adobe Illustrator / Animate / Character Animator / Fuse / Dimension, Unity3D, the Procreate iPad app, Agisoft Photoscan, MeshLab, Instant Meshes, Mixamo, etc. … Simply trying to list the most commonly used apps is exhausting (much less all the other emerging apps we investigate, or the ones we mastered that went away. I still love you HyperCard, Director, and Flash!). Phew.

However the pieces of animation are generated, we still end up spitting out thousands of images or video files that have to be lined up in Adobe After Effects / Premiere / Media Encoder to assemble the final video that we can upload to YouTube or Kaltura and send to you.

What I’m saying here is: this whole process usually takes weeks or months. Or… we can just do it all in VR in an afternoon.


The new reality… of easy bake dreams

Tvori is an amazing tool to easily puppet objects and characters around in VR. You can record audio in directly, and export 4K videos, 360 videos, or animation data for all those old programs i mentioned above. The main reason I set out to write this blog post: was to promote Tvori. It offers an all-in-one easy pathway to making your own animatons in mere minutes. This amazing program runs about 20 bucks, and unlike the other (free) VR tools I’ll mention below – Tvori isn’t backed by a major corporation (*yet). I expect to be generating much more animation work for instructors with it, and hope to be advising you all on how to use it yourselves as you step into VR through your own office computers.

I’d say Tvori offers a level of animation comparable to an “animatic” – a movie industry term for quick and dirty approximations of what the final multi-million dollar film could look like. There’s a good chance animatics will be good enough for the bulk of concepts we wish to impart to students at the university level, with the added bonus that we can generate many of them in a single term. That said, maybe you’re curious what other creative tools are emerging in VR these days?

1) Whiteboard animations are a common request at Ecampus. Oculus Quill lets us draw and animate in this cartoon style in 3D (so it’s like our current 2D drawing tools, but we can move the camera around freely at any time, zoom-in endlessly,). This free tool for Oculus Rift users was updated last month to add a ton of new useful tricks.

We’ve already made fly-bys of 3D drawings in Google Tiltbrush, but we couldn’t actually animate the drawings directly (we just started recording, and moved our head through space). But both these programs are free and worth looking into.

2) In Oculus Medium, anyone can sculpt objects in the air at high resolution with weightless clay. If you own the Oculus Rift, this is an free and amazing tool for creating 3D objects. Now we can make things extremely fast and bring them into those old programs we’ve used for years.

Google Blocks is a similar free tool to quickly make solid low-resolution objects (it’s like Google Sketchup with VR ease and benefits). Upload them to Google Poly to share with the world (a service very similar to SketchFab or Microsoft’s Remix 3D). With these sculpting tools, and repositories of free creations, it’s a snap to gather the building blocks needed to start complicated animation projects. For example, we can bring any of these sculpted objects right into Tvori…

3) Final thought: you can use Google Earth VR to walk around any location on earth, while scaling up to Godzilla height or even zooming in and out from space. The multimedia team can record what you’re seeing and pointing at, along with your narration. While this isn’t a feature of the software (yet), we have the magic means to do it for you. (And we can also go back into Google Earth Studio to make a more polished and precise version of the path you traveled).

I hope this inspires you to go get a VR headset, come by our offices and try it out, or let us don the gear for you. We look forward to making your imagination a reality for students worldwide!

Narrative and World-Building

For this post, I will focus on two simple strategies you can use to improve motivation and engagement in your online course, narrative and world building. These terms are used frequently in games, as well as in literature, film and other domains. They are a powerful tool, easily applied to your existing course material or as you develop new content.puzzle world

If you want some background about where my thinking is coming from, check out my last blog post, Games as a Model for Motivation and Engagement, Part 1, where I take a deeper dive into gaming and Self-Determination Theory. I would also recommend a post by Dr. Meghan Naxer, Self-Determination Theory and Online Education: A Primer.

There are two kinds of world building I’d like to talk about; instructor-created narrative and student-created narrative. To set the tone for our thinking about this, I’ll start with a quote from Designing for Motivation.

“… if you increase autonomy then engagement will improve, if you increase competence then motivation will increase, and if you increase relatedness then wellbeing will be enhanced–these needs become the controllers we tweak and adjust to iterate on and improve experience.”
(Peters, D., Calvo, R. A., & Ryan, R. M. (2018) Designing for Motivation, Engagement and Wellbeing in Digital Experience. Frontiers in Psychology, 28 May 2018. DOI: 10.3389/fpsyg.2018.00797)

So how can we use world building to ‘tweak’ these three controllers?

Instructor-Created Narrative

role-playing game diceInstructor-created narrative refers to the world or environment created by the course builder and determined by the story they are telling about that world. This world building can be for a particular course activity, but also keep in mind that your entire online course is a learning environment and you, as the course builder, have significant influence over how that world is curated. A colleague recently described how an instructor begins their course with the phrase, “Welcome scholars”. This sets a tone that is a competence-supportive environment with just two words. Tone is a commonly used tool for world building across many domains.

As a simple entry point for world building, I’ll start with a classic type of game, role-playing.

Brainstorm Exercise

Consider setting up a role-playing scenario for one of your existing activities or assignments. What is the outcome you expect students to achieve from this activity? Imagine a situation (or world) where that outcome exists or can be applied. What does that situation look like? Now, imagine you are a student in that situation, what does this world look like? (See what I did there? Role playing!) How will your student interact with that world to achieve your outcome? Take a minute or two to note your answers to these questions. This is a good way to begin sketching out your narrative. Once your sketch is complete, you can begin moving the parameters and rubrics of your existing activity into this world.

The world you create for your scenario can be the ‘real world’ in a particular time period, a hypothetical political situation, a business/client relationship regarding a product, or a hypothetical world to resolve a physics problem. Here are some ways you can frame your thinking as you practice the above exercise:

  • Take the tools you have provided in the course content (competence) and use them to analyze the following situation (world building). “How would you apply what you learned this week to the following situation?”
  • Even better, “How will the situation change as a result of your decisions?”

A small change in wording can provide big changes in thinking. In the second bullet point, we have moved from applying the week’s content to a given situation to a personalized critical analysis.

Student-Created Narrative

The other side of the coin is allowing students to build on your narrative, or create their own. This is where you significantly impact autonomy. This is your world, you create the rules. You set the parameters that will focus student thinking toward the outcomes you hope for them to reach. The rules you set will determine the level of autonomy the student experiences.

Brainstorm Exercise

For this exercise, you can continue with the role-playing scenario you built in the previous Brainstorm Exercise or choose another existing activity from a course. Let’s brainstorm some ways you can add autonomy to this activity.

A simple addition to the role-playing scenario we built previously would be to allow students to choose the role they will play. You have built a narrative, now let the student choose the character they will play to build on that narrative. If you need to keep things more focused, it is totally acceptable to restrict the roles to a list of options. Even with restrictions, is it possible for students to choose the gender, race or economic background of their character? What other characteristics can you think of that will help a student take ownership of the role?

For other kinds of activities, consider giving students the creative freedom to choose and build their own narrative. The instructor still defines the rules of the world and sets the outcome and rubrics for the activity. Can you open up the choices a student has to meet these outcomes? Allow students the autonomy to take ownership of how they get to your outcome, using your rubric as a guide.

For example, select a concept that was covered in the course. In your activity, allow students to choose where and how that concept can be applied. Let them build the narrative around the concept. Conversely, select a setting in the world, much like you would for the role-playing scenario. Allow students to choose the course concepts they want to apply in that setting and build a narrative around that. This strategy lends itself well to case studies. Rather than taking on a specific role, students become story creators, while still working with instructional concepts and within the rules defined by the instructor.

Group World Building

As I mentioned in my previous post, group work and community building (as modeled by gaming communities) are great ways to increase relatedness in a course. Community members are able to share their competence and, in turn, feel valued by that community. This is another great support of motivation.

All of the strategies discussed above can be applied to group work. You can set up the same role-playing scenarios, but this time multiple students will take on different roles and interact in those roles within their group community. Relatedness is impacted as decisions and actions taken by one student will affect the world that is being collaboratively built. Here are two examples from a media course I recently helped develop. They both reflect the range of complexity group world building can undertake.

Pitch Game (Group Discussion)

For your Initial Post in this discussion, pitch a new television show. Follow the parameters presented in class; including X+Y claims, audience description, sketch of the show’s audience and the ideal network for the show. For your Peer Response, you will take on the role of media buyer. Choose which network or streaming service you work for. Review all available show pitches. Decide which show you will purchase. Reply to the show you wish to purchase; identify the network you represent and write your reasoning why you want to make the purchase. Use course material to support your decision.

Trial Simulation (Group Project)

To better understand the ways in which civil law shapes the media ecosystem, we will enact a short trial simulation. The court of the Honorable Judge is an appeals court: this means that the FACTS of the case were decided by the TRIAL court. The question that will be litigated in class regards the law and the interpretation of those facts.

One student will take on the role of Plaintiff, another will be Defense and a third member of the group will be the Judge. Over the next two weeks, you will follow the posted schedule to present your arguments and answer questions from the Judge. Before proceeding, review the Debate Rules and Trial Facts documents. You will be expected to cite actual Supreme Courts cases to support your claims.

Hopefully, this blog has provided some simple entry points for using world building to increase autonomy, build competence, and improve relatedness in a course to improve motivation and engagement. I would love to hear what you come up with in the Brainstorm Exercises.

Dice Image: “DSCF5108” by joelogon is licensed under CC BY-SA 2.0
World Building Image: puzzle-ball-1728990_1920 from Pixabay

I am an avid gamer. For some time, I have been thinking about how engaging games are and whether this quality can be leveraged for other purposes; like instruction. Put more simply … What is it about games that makes them so engaging? Is there something about this that we can use as educators? Granted, these are not new questions.

Dr. Meghan Naxer recently posted a primer on Self-Determination Theory (SDT), Self-Determination Theory and Online Education: A Primer. I believe SDT does an excellent job describing much of what makes games so motivating and engaging. Indeed, games provide an excellent model of SDT and can inform us on how the three basic psychological needs (autonomy, competence and relatedness) might be met in learning environments. I hope to build on some of the concepts introduced in Meghan’s post.

This is the first in a series of posts on games as a model for SDT. In part 1, I look at the convergence of Autonomy, Competence and Relatedness in gaming and online learning in relation to building community and intrinsic motivation.

Autonomy: Open Worlds

Games are becoming increasingly complex, particularly in the arena of Open World games where players are allowed to choose their own paths (autonomy). Entire worlds, even universes, exist for you to immerse yourself in, each with their own history and internal logic. You are often thrown into a new world with few instructions.

For example, in the Open World game No Man’s Sky, millions of stars and planets are procedurally generated just for you, unique to your specific game. When this game begins, you appear on an alien planet next to a broken space ship. Your space suit is running out of oxygen. No instructions, just urgent messages from your onboard computer on toxicity and your decreasing oxygen levels.

The complexity of modern open world games is more than can be reasonably covered in a tutorial. Besides, a significant part of what makes the game engaging is the autonomous exploration and discovery. You decide how you will play the game, in what order you will do things and at what pace. Being told how to play the game is far less interesting.

Here is the internal logic of No Man’s Sky:

  • You’re in an alien environment.
  • It seems like you are alone.
  • There are problems to solve.
  • There is no instruction manual.
  • You must explore to solve these problems.

Think about that in comparison to your online students when they first enter your course. Online students do have instructions to help them get started. However, at first glance, it can seem like they are thrown in the deep end to figure things out for themselves. In a situation where intrinsic motivation is less clear, this can lead to frustration. That does not have to be the case. For gamers, there is one more bullet-point.

  • When you get stuck, you can turn to an online community.

If you were to talk to a gamer and describe your experience about how many times you ‘died’ trying to figure a game out, a common reaction would be something like, “Why would you do that? You know there’s a wiki, right?” Playing an online game today is not a solo venture, even if it is a solo game.

Relatedness: Gaming Communities

Online communities spring up around successful games to support players. A majority of large games have an accompanying Wiki, many of which are curated and updated by players. Various online communities exist to discuss specific games in forums and social media. Players discuss technical issues, the internal logic of a game, the lore and history of the game’s world, where to focus their efforts when starting, or the best order to do certain tasks for best success.

The point here is that given the resources, an intrinsically motivated group of people will figure out ways to help each other succeed. This speaks to Relatedness. In an environment where players are given maximum autonomy, they turn toward their community to support that autonomy and gain competence in that environment. Further, when given an opportunity to contribute to supportive communities, to share their competence, players feel valued as members of that community. So, can we create something like this environment in an online course?

Intrinsic Motivation: Sharing Competence

The challenge in my above summary is intrinsic motivation. There is something of an inherent motivation to play a game and get better at it. Though it can be less clear, online students also have intrinsic motivation beyond just ‘passing the course’. Community building can be a way to help students to discover and support these motivations.

Following the gaming example from above,

“Players discuss technical issues … where to focus their efforts when starting, or the best order to do certain tasks for best success.”

This is a good place to start building community. Simply encourage your students to share their success strategies in your course.

Formalize this by setting up a forum-style environment where students share their experiences, the process they used to solve a problem, the biggest stumbling block this week, or simply to ask each other for help. Much of this could also be accomplished through existing discussions or peer reviews by simply adjusting or adding language for students to draw from their own success strategies, “What did you discover this week that would benefit another student?”

Group work is another tool that can be used for helping students discover intrinsic motivation and build community. Challenge students to work together to apply this week’s content to something in their own lives, a subject of their choice. Trust them to find the problem that needs solving. This is similar to participation in a gaming community – sharing and building competence. But in this case, you are allowing students to build the narrative.

By giving students some autonomy in deciding the end product of their work, you are creating an opportunity for them to discover what drives them.

With all of these examples, it is perfectly reasonable to set the ‘internal logic’ of the environment; subject matter to be discussed, the completion goals, length of the project, rubrics for assessment purposes. The idea is to allow students more autonomy in determining how to get to these goals. All that you are really changing, compared to a typical assignment, is control of the narrative.

And that is a nice segue to the topic of my upcoming post, Part 2, Games as a Model for Motivation and Engagement – Narrative and World-Building

Could your online course use a boost? Is it lacking the secret spice that could be the difference between students coming away feeling satisfied rather than feeling like something was missing? Maybe there is a complex topic that students are consistently having a difficult time understanding or perhaps a particular concept that begs for more than a Power Point with some bland images collected from the internet. Well, perhaps the missing ingredient is an animation!

A brief history of animation…

In 1914, cartoonist Windsor McCay wowed audiences with his short animated film. Although not the first animation ever produced, Gertie the Dinosaur broke ground by employing new techniques, such as keyframes, loops, and the use of an appealing character, all of which would become standard practice in the creation of future animations. Interestingly, Gertie the Dinosaur also featured an interactive element where McCay would appear to give commands to Gertie which she would then carry out on screen.

Fast forward to 1928 where upstart Walt Disney Studios released the animated short Steamboat Willy and introduced the world to Mickey Mouse. Steamboat Willy also marked the first use of sound integrated onto film in an animation.

The 1930’s saw a boom in animation with Warner Brothers creating  its Merrie Melodies and Looney Tunes cartoons which featured a cast of outrageous characters including Bugs Bunny and Daffy Duck and arguably some of the most enduring pop-culture references ever. I admit, the Looney Tunes were an invaluable supplement to my formal elementary school education!

Disney upped the ante in 1937 with the release of the first feature length animated film Snow White and the Seven Dwarves. With Snow White, the Disney animators ventured into uncharted territory and proved that an animated film could be both visually stunning and a legitimate medium for storytelling. It was also around this time that the Disney animators planted the seeds of what would become the 12 principles of animation, a system of principles and techniques which have endured to this day and serve as the foundation in the creation of animation and motion graphics.

In the 1940’s and 50’s Disney continued to produce classics with films like Bambi and Fantasia while  another animator, Ray Harryhausen, perfected his “Dynamation” stop motion technique and brought fantastic monsters to life alongside live actors in films like The 7th Voyage of Sinbad and Jason and the Argonauts. Meanwhile, across the Pacific Ocean the Japanese were busy developing their own unique style of animation known as anime.

In 1960, The Flintstones became the first animated prime time television series and paved the way for animated programs like The Simpsons, the longest running series of all time.

In the 1970’s, animated cartoons dominated Saturday morning television. Although the content was mostly aimed at keeping kids engaged while mom and dad slept in, the power of animation’s potential as a learning tool was being explored in the form of short interludes during the commercial breaks. Most notable, Schoolhouse Rock combined animation and music in a powerfully memorable format to teach kids topics like grammar, history, math, and science. Meanwhile, Sesame Street  featured groundbreaking animations aimed at teaching through entertainment.

In the 1980’s, the computer arrived and ultimately revolutionized the way that animation was created as well as the way it looked. It was a clunky start but by 1995, Pixar studios released the first entirely computer animated feature Toy Story and there was no looking back. The omnipresence of the internet added fuel to the fire and allowed anyone with a laptop and a story to tell to publish their ideas to the world.

So, what does all of this have to do with online learning? Well, before the pedagogical red flag goes up and you think that animation is just for kids or that it’s too frivolous to occupy space in the world of higher education, read on.

We need look no further than the media that we consume on a daily basis to see how ubiquitous animation is. From television commercials, to the prevalence of the online “explainer” video, to online apps such as Headspace, which utilizes  animations to demystify the practice of mindfulness and meditation, animation is proving to be an effective medium to deliver information and get it to stick. Why wouldn’t we want to implement this powerful and available tool in online learning?

A well-crafted animation is a multi-sensory experience that can take a complex or abstract concept and explain it in a way that is concise, understandable, and engaging to the learner. Combining audio/verbal and visual information to illustrate difficult topics allows learners to associate images with concepts and has been proven to actually increase learner understanding and retention.

Additionally, animation can be used to visualize things that would otherwise be impossible or too cost prohibitive to depict with film, text, or still images. Things such as a biological or chemical processes that are invisible to the naked eye, or the ability to look beneath the earth to witness how a plants’ roots grow and utilize nutrients, can effectively be illustrated with animation. Larger scale events like planetary orbits, the hydrologic cycle, earthquake science, or the Russian Revolution can be represented in ways that are much more effective than using still pictures with arrows and text. Does the topic require a horse, a bug, a whale, a tractor, a piece of DNA? There’s no need to worry about the exorbitant costs and time required to train, catch, dive, drive, or dissect…simply animate it!  Animated characters, human, abstract, or animals can also add visual appeal and inject humor into a lesson. Finally, and arguably most important: animations are entertaining! If the student is entertained, they are more likely to be engaged in the subject matter and if they are engaged, they are more likely to retain information.

So what’s the next step? The Ecampus Custom Team is here to help you develop your animation. We’ll start by meeting with you to determine a learning objective and to brainstorm ideas for the project. You can view examples of our work to see if a particular style sparks your interest or, if you have a specific aesthetic in mind, we will work with you to refine it. Once we have pinned down a solid direction for the project, we’ll work with you to create a script. The script will serve as the narration for the animated video and is vital as it is an opportunity to distill the content down to its most potent elements. We prefer to keep the maximum length of the animation under 5 minutes and have found this to be most effective for the learner. When the script is finalized, you will come in to one of our studios to record the voice over narration. At this point, it’s full steam ahead and our team begins production on the animation! We’ll check in with you regularly with samples and progress reports to ensure an amazing final product.

-James Roberts, media team, Oregon State University Ecampus

References:

What’s An Image’s Value?

Image of postcard with a picture is worth a thousand words written on it.

Have you ever created an online course without using images? No?

That is not surprising as images can convey emotions, ideas, and much more. Their value is often captured in an old adage: A picture is worth a thousand words.

This article will discuss the value of images in online course design and how using visuals to accompany instruction via text or narration might contribute to or detract from an online learning experience. Let’s begin.

Multimedia Learning: Images, Text, and More

Online learning is a modern form of multimedia learning. Richard Mayer (2009) described multimedia learning as that learning that integrates the use of words and pictures. In traditional classrooms these learning resources might be experienced as: 

  • Textbooks:  Text and illustrations.
  • Computer-based lessons: Narration w/animation
  • Face-to-face slide presentations: Graphics and audio.

In online learning multimedia may also include:

  • eBooks: Text and digital images 
  • Video: Text, images, animations, coupled with audio.
  • Interactives: Maps, images, and video.
  • Digital Visual Representations: Virtual worlds and 3D models.
  • Screencasts: Software demos, faculty video feedback, and more.
  • Audio: Enhanced podcasts or narrated lectures.

These two short lists, although not exhaustive, demonstrates the importance of visual elements to multimedia based learning in online courses. There are many reasons why we might include any one of these multimedia learning experiences in an online course. For our purposes we will explore a bit more the instructional value of visuals to online learning.

So, how do words and pictures work together to help shape learning? Given that this is perhaps the most common learning object used in an online course it would seem useful to understand what may be considered this simple interpretation of visual literacy for learning (Aisami, 2015).

Visual Engagement Of A Learning Object

In a recent study of how people acquire knowledge from an instructional web page Ludvik Eger (2018) used eye tracking technology to examine a simple learning object composed of a title (headline), a visual element (i.e., diagram), and a box of written text. With no audio support for the learning object in this study, participants engaged the content via visual engagement alone. Results indicated that the majority of students started their learning process at the headline or the headline and visual element. The box of information, in text form, was the third part of the learning object engaged.

Within this context eye movement analysis indicates a learning process that is dependent upon a consistent visual flow. Purposely connecting the title, visual element and information text of a learning object may best reinforce learning. By doing this the course designer/instructor becomes a sort of cognitive guide either focusing or not-focusing learning via the meaning structure of the various learning object elements. In our case we want to use visual elements to support performance and achievement of learning tasks.

Choosing Visual Elements

In order to explore the choice of visual elements in an online learning experience it is helpful to understand how we process that experience from a cognitive science perspective.

Clark and Mayer (2016) describe that cognitive science suggests knowledge construction is based upon three principles: Dual channels, limited capacity and active processing. Let’s briefly examine what these are.

Dual channels:

People have two channesl of cognitive processing 1) for processing visual/pictorial material and 2) one for auditory/verbal material. See Figure 1.  below.


Model of cognitive model of multimedia learning.
Figure 1.: Model of the Cognitive Theory of Multimedia Learning

Limited capacity:

Humans can only process a few bits of pieces of information in each channel at the same time.

Active processing:

Learning occurs as people engage in cognitive processing during learning. This may include attending to relevant material, organizing that material into a coherent structure, and integrating that material with prior knowledge.

Due to the limits on any learner’s processing capability it is paramount that we select visual images that help manage the learning process. Our goal is to limit excessive processing that clutters the learning experience, build visual support for representing the core learning process, and provide visual support that fosters deeper understanding of the learning at hand. What does this mean in practice?

Managing Processing Via Image Use

Making decisions about image selection and use is a key to managing this learning process. Understanding the meaning of images to select is also key and is really a function of literacy in one’s field and visual literacy in general (Kennedy, 2013).

In practice we can use the following guidelines to make decisions about image use in multimedia-based online learning. 

  • Control Visual Elements – Too many images on a web page or slide may force extraneous cognitive processing that does not support the instructional objective. 
  • Select Visual Elements Carefully – Images difficult to discern are likely to negatively impact learning. Think about good visual quality, emotional and intellectual message of the image, information value, and readability.
  • Use Focused Visual Elements – Target selection of visual support to those images that represent the core learning material and/or provide access to deeper understanding of that core content.

Other Image Tips

Emotional Tone: Emotional design elements (e.g., visuals) can play important roles in motivating learners and achievement of learning outcomes (Mayer, 2013).

Interest: Decorative images may boost learner interest but do not contribute to higher performance in testing (Mayer, 2013). Use decorative images prudently so they do not contribute to extraneous learning processing (Pettersson & Avgerinou, 2016).

Challenge: Making image selections that contribute to a degree of confusion may challenge learnings to dive more deeply into core learning. This is a tenuous decision in that challenge in sense making may prove to foster excessive processing.

Access: Images must be presented in a format that is viewable to users to be practical. This involves an understanding of technical features of image formats, download capability, mobile use, and universal design techniques.

Final Thoughts

It is valuable to remember that visuals communicate non verbally. They are most effectively used when carefully selected and paired with text or audio narration. Visuals appeal to the sense of sight. They have different classifications and could be pictures, symbols, signs, maps graphs, diagrams, charts, models, and photographs. Knowing their form, meaning, and application is part of being a visually literate course developer or instructional designer.

Web Resources

References

Aisami, R. S. (2015). Learning Styles and Visual Literacy for Learning and Performance. Procedia – Social and Behavioral Sciences, 176, 538-545. doi:10.1016/j.sbspro.2015.01.508

Clark, R. C., & Mayer, R. E. (2016). E-learning and the science of instruction : Proven guidelines for consumers and designers of multimedia learning. Retrieved from http://ebookcentral.proquest.com

Eger, L. (2018). How people acquire knowledge from a web page: An eye tracking study. Knowledge Management & E-Learning: An International Journal 10(3), 350-366.

Kennedy, B. (2013, November 19). What is visual literacy?. [Video file]. Retrieved from https://www.youtube.com/watch?time_continue=1&v=O39niAzuapc

Mayer, R. E. (2009). Multimedia learning (2nd ed.). New York: Cambridge University Press.

Mayer, R. E. (2014). Incorporating motivation into multimedia learning. Learning and Instruction, 29, 171-173. doi:10.1016/j.learninstruc.2013.04.003

Rune Pettersson & Maria D. Avgerinou (2016) Information design with teaching and learning in mind, Journal of Visual Literacy, 35:4, 253-267, DOI: 10.1080/1051144X.2016.1278341


Credit: Embedded image by Kelly Sikkema on Unsplash.com

What is it?

Image of animator’s face in Character Animator program showing the facial data points used for animation creation.

Facial motion capture (Mo-Cap) is a process that uses a camera to map and track points on the user’s face. Software such as Adobe’sCharacter Animator derive data from the camera to animate cartoon characters in real time. This can greatly reduce the amount of time needed to create an animation and breathes subtle life into the character that would be otherwise difficult to achieve. Character Animator harnesses the power of the webcam to map several parts of the face to the respective parts of the character allowing it to record in real time. This includes your eyebrows, eyes, mouth, and head position. It also intakes audio to change mouth shapes to match what the user is speaking. In addition to the webcam, the user can operate their keyboard to trigger additional movements, effects, and walk motions. All these different aspects combine and give the character a personalized feel.

How does it help?

Image of character being rigged into a puppet showing the mesh and body tags.

Cartoon animations currently do not have a large presence in online learning. This is mostly because they take a long time to create and not everyone has had the resources to create them. Normally, character animation for cartoons requires drawing each frame or using a pose-to-pose process called key framing. With innovative technology such as Character Animator, it greatly reduces the barrier to create cartoon animations for online learning. Each motion of the face records instantly and gives the character life by adding subtle movements to the face and head. The bulk of the work is completed early on to draw, rig, and add triggers to the character, or in this case, the puppet. Once the puppet is set up to record, it is smooth sailing from there. All movements, audio, and facial expressions are recorded in one take; greatly reducing the amount of time for development. However, Character Animator allows you to choose which aspects you want to record, so you can record the eye movements one time, then the eyebrows another time. This is helpful for the perfectionists out there who cannot seem capture it all at once.

How does it work?

To create an animation using Character Animator, there are a handful of stages to complete. The first step is to draw the character in either Photoshop or Illustrator. Next, Character Animator imports the graphics and they are rigged into puppets to prepare for recording. This means the eyes, nose, mouth, etc. are tagged with their respective labels. Also during this time, you can create keyboard triggers. These are animations such as arm movements, walk motions, and more, that the pressing of certain keys on the keyboard triggers the character to perform. After the puppets are prepared, it is time to record. It does not have to be shot perfectly all at once; you can blend the best bits from different recordings into one masterpiece. The last step is to export the character’s recording and composite it into a story using video software such as Premiere Pro or After Effects. Once you achieve the flow of facial Mo-Cap, you can start cranking out animations faster than ever before.

Click Image to View Video

Below is a quick rundown of what it takes to set up a character and how to record it. At the end of the video, there is a sample of multiple characters in one scene.

What does the process look like?


Author: Zach Van Stone, Oregon State University Ecampus

When teaching face-to-face, you might break your lectures into weeks because you will only meet with students once or twice a week.  You hope to give them all the information they need during your face-to-face sessions for them to successfully complete work independently between classes.

While a typical face-to-face lecture can span 50-90 minutes, there is evidence to suggest shortening the length for your online students may be a better practice.  Your online students may be in and out of your course many more times than they would be face-to-face and this gives you the opportunity to think about designing your video lectures differently.  Organizing your lectures topically, rather than weekly can be a powerful way to redesign your course.

Students can find what they need, when they need it

Imagine you are taking a course on humor and Week 1 covered the causes of laughter.  Midterms are approaching and you realize you understood the causes exaggeration and anticipation, but can’t remember what protection was about.  If there was one long lecture on the causes of humor, you would have to re-watch or scroll through the whole lecture to find this one piece of information.  But, if your instructor had each of the lectures separated out and named by topic, you could easily review the one topic that was confusing to you.  If you have a limited amount of time to study, you can place your focus on studying the content, rather than finding it.

The practice of topic-based videos also makes finding content later much easier for your learners. Consider how much harder it is to find information when you are looking through titles like “Week 2”.  By Week 9, when students might be reviewing for their final, is it likely they will remember exactly what you covered in Week 2?  However, they could quickly glance at topical titles to jog their memory when deciding what to study.

Speaking from experience, I reviewed videos from a course I had completed to prepare for a job interview.  I remembered that the course had the lectures broken out by topic rather than week, so it was easy to refresh myself on concepts that I was sure would come up with the employer.

Students can digest smaller pieces

Topical lectures, perhaps several short ones per week, are easier to digestible than weekly lectures.  And, shorter lectures are more likely to be viewed by students.

Imagine a course where the topics might be complex, intimidating or unfamiliar.  For me, this could be German.  If I bought a German book today, I know it would sit on my shelf collecting dust.  But, I might use an app like Duolingo to learn a couple of words each day, which feels much more manageable.  Consider that microlearning is advantageous, particularly for adult students that may benefit by breaking their studying into many small, achievable sessions.

It is faster and easier for you to make changes

If you are noticing that students are just “not getting” a certain topic, it is much easier to rerecord a small video on just this one topic than to rerecord a long video on several topics.  This is particularly true if many of the topics covered are being understood – why make more work for yourself?

It is also easier to rearrange videos if they are topical.  If you realize that one topic belongs in Week 2 and not in Week 7, you can simply move that one part without re-thinking the whole week two video.

Topical videos allow you to add value to other course materials

An effective use of short videos can be to add value to the topic through your experience or expertise as the instructor.  You can discuss a case study or scenario that relates to a topic that helps students understand the topic in action.  Rather than a long video that includes both the lecture and the example, break these into two parts.  If you totally reiterate what students are learning in another part of their course, like a reading, they might wonder why they are doing both activities.  But, your examples add a layer of meaning and depth to the other course materials.

People can find almost any information on the internet.  Part of their motivation to take courses is to gain access to your knowledge as an expert in the field.  Short videos that talk about real-life situations adds both instructor presence and meaning for students.

Short videos load more quickly

No one wants technology to be a barrier for students.  Short videos load more quickly, which can be important to students that don’t have consistent access to high-speed internet.  You don’t want the student to get frustrated and give up simply because a video is too long, when it can easily be divided into pieces.

Challenge yourself to be focused

By committing to create shorter content, you challenge yourself to be focused and refined in what you share.  By setting a goal, like recording videos under 7 minutes per topic, the quality of the content must be top notch.  This encourages you to review your content to cut out what is redundant, unclear, or off-topic, which can be very satisfying.  And, if you model being on point, precise, and specific – your students will have a clear expectation on the quality of work they are expected to create as well.

Examples

Like some inspiration to get started?  Thanks Joanna Abbott for this example that comes in at 4 minutes and 41 seconds: ALS 114 decision making matrix

So you’ve scheduled your first video shoot with Ecampus. Great! We can’t wait to work with you. Here are answers to a few questions we commonly receive from instructors.

How can I prepare for my video shoot?

Rehearse! And this doesn’t have to be a bunch of work, just run through your piece once or twice before the shoot.

If you’d like for the finished video to include any additional graphics, photos or video, please let a member of the video team or your instructional designer know in advance of the shoot so that we can plan accordingly.

Should I write a script?

Maaaaaaaybe. It’s up to you. Some people prefer to work from a teleprompter, others prefer to wing it. We always suggest going with your comfort zone. If you would like to work with a teleprompter, please send your script or bulleted list to ecampus.productions@oregonstate.edu at least one day before your shoot.What should I wear?

Wear clothes that are comfortable and make you feel good about yourself…that’s the priority. Feel free to show off your personality and have fun with it.

Here are a few guidelines:

  • Avoid wearing plain white. It’s distracting against a black background, and gets lost in a white background.
  • If you’ll be filming against a black background, you’ll want to avoid wearing black, lest you appear to be a floating head and arms in your video. Also, black or really dark clothing can sometimes cause more shadowing on the face, accentuating wrinkles and aging the subject.
  • Instead, you might consider a medium-dark blue or gray. Or even better, go for a rich, solid color.
  • Also, avoid tight lines and patterns. These types of patterns cause a distracting optical effect called moiré where the pattern appears to move. Larger patterns, like plaid, look fine.
  • Finally, please avoid noisy jewelry and accessories as the microphone may be able to pick up the noise.

Oh gosh! Now that I’m here and I’m on camera, I have no idea what to do with my hands.

Think of the camera as another person. How do you move when you’re talking to somebody? If you tend to gesture when you speak, then please do! The movement will add energy to the video and help to convey your excitement about the topic.

Another option is to hold a prop. Just be sure that your prop is relevant to the video so that you don’t confuse the viewer.

If you prefer to be more still, that’s also great. Just be sure to maintain open body language and avoid crossing your arms in front of you or behind you.

This terrific Wistia article talks about the science behind why your gestures look so awkward on camera and dives into the hand thing a bit more, explains why we feel so awkward on camera, and suggests some ways to feel more comfortable at your video shoot.

That’s A Wrap!

If you have any questions, concerns, or ideas to share, please contact the Ecampus video team at ecampus.productions@oregonstate.edu. Looking forward to working with you!


Many online instructors create video lectures or include existing videos to model new skills and to expose students to new content. But how do you know that your students are engaged?

To make video watching an active learning experience, add Kaltura’s interactive quiz feature to your lectures or to YouTube videos. You can access Kaltura’s simple quiz tools from Canvas’s My Media tab, or provide Ecampus with quiz questions and let us build the quizzes for you.

Features:

  • Add multiple choice questions with 2-4 answers to any point in your video
  • Accompany the quiz with a pdf viewing guide containing all quiz questions
  • Graded and ungraded options
  • Integrated with the Canvas Assignment tool and Gradebook

How would you like students to interact with your videos? Depending on your needs, you can set Kaltura interactive video quizzes to:

  • Prevent students from advancing the video until they’ve answered each question
  • Prevent students from changing their answers
  • Reveal or withhold answers upon quiz submission

The question appears at the top of the video screen. Three answers are below, along with the option to "Skip for now" and a tally of the number of unanswered questions and an indication of which question this is.
Grammar question embedded in SPAN 211 video

In recent Ecampus courses, world languages faculty have embedded Kaltura interactive video questions at different points in videos to achieve different aims. In Second Year Spanish, grammar lectures conclude with questions that test students’ application of the grammar rules discussed earlier. The placement of questions at the end of the video holds students accountable for watching and understanding the entire lecture.

French author interview with questions interspersed along video progress bar
Numbered hexagons 1-6 indicate the placement of quiz questions in the video’s progress bar

In Introduction to French Literary Studies, interviews with authors are interspersed with questions that confirm students’ listening comprehension of topics directly after each topic is discussed. When students are unable to answer a question, they become aware of gaps in their French language listening skills and can rewatch the segment they misunderstood. Engaging in repeated listening is a critical second language learning strategy that instructors aim to foster in their students (Berne, 1998). Kaltura interactive video quizzes are a simple and fast method that gets the job done.

This tool’s usefulness isn’t limited to world languages faculty. Speak with your instructional designer about how to apply this tool to lectures and videos in your own academic discipline.

References and Resources

Berne, J. (1998). Examining the Relationship Between L2 Listening Research, Pedagogical Theory, and Practice 1. Foreign Language Annals, 31(2), 169-190.
Interactive Video Quiz Canvas Gradebook User Guide
Interactive Video Quizzes Guide for Creating Quizzes

If you’ve ever needed an excessive amount of photographs or diagrams to accurately describe a physical object for your class, you may benefit from a 3D model.

Standard media types, including text, photographs, illustrations, audio, video, and animation, are crucial to the online learning experience. A 3D model is essentially another media type with a lot of unique qualities.

What is a 3D model?

3D models, in this case, are digital representations of physical objects. 3D models generally consist of a polygon mesh and a surface texture. The polygon mesh is a “shell” comprised of the different surfaces of a 3-dimensional object. There are three main components that make up this shell: vertices (points), edges (lines), and faces (planes). For what should be clear from the previous sentence, polygon meshes are often referred to as simply “geometry.” There are a lot of other technical terms associated with polygon meshes, but in practical application, you may never need to learn them.

The surface texture, at its most basic, is an image, mapped onto the surface of the polygon mesh.

A texture can be as simple as a solid color, or as complex as a high-resolution photograph. The texture will be wrapped onto the surface of the geometry with the help of a set of instructions called UVs. UVs are a complex topic in and of themselves, so it’s good enough that you just know they exist conceptually.

These textures can have physics-based properties that interact with light to produce effects such as transparency, reflection, shadows, etc.

You’re probably thinking to yourself now, that 3D models are too complicated to be of use in your courses, but that’s not necessarily true. The composition and inner workings of 3D models are complicated, for sure, but you don’t need to be an expert to benefit from them.

Where did they come from, and how are they used?

There probably isn’t a day that goes by where you don’t experience a 3D model in some way. They are everywhere.

3D models, in digital form, have been around for decades. They have been used in industrial applications extensively. 3D models are used to generate toolpaths for small and large machines to manufacture parts more consistently than a human could ever hope to. 3D models are also used to generate toolpaths for 3D printers.

3D models are used in movies, animations, and video games. Sometimes entire worlds are created with 3D models for use in virtual and augmented reality.

Modern interfaces for computers and smartphones are awash in 3D graphics. Those graphics are rendered on the screen from 3D models!

How can they help me as an educator?

If you’re still not convinced that 3D models hold any benefit to you, I’ll explain a few ways in which they can enrich your course materials.

  1. 3D models are easily examined and manipulated without damage to physical specimen.
    • If you are involved in teaching a course with physical specimens, you are no doubt familiar with the concept of a “teaching collection.” A teaching collection is a high-turnover collection that gets handled and examined during class. Normally these collections break down quickly, so instructors are hesitant to include rare and fragile specimens. Having digital proxies for these rare and fragile specimens will allow students access to otherwise unknown information. This has even bigger benefits to distance students, as they don’t have to be anywhere near the collection to examine its contents.
  2. 3D models give students unlimited time with a specimen
    • If you have a biology lab, and the students are looking at skull morphology, there’s a distinct possibility that you would have a skull on hand to examine. If there are 30 students in the course, each student will have only a short amount of time to examine the specimen. If that same skull was scanned and made into a 3D model, each student could examine it simultaneously, for as long as they need.
  3. 3D models are easily shared
    • Many schools and universities around the world are digitizing their collections and sharing them. There is a fair amount of overlap in the models being created, but the ability to add regionally exclusive content to a global repository would be an amazing benefit to science at large. Smaller schools can have access to a greater pool of materials, and that is good for everyone.
  4. 3D models have presence
    • A 3D model is a media object. That means it can be examined, but it’s special in the way that it can be interacted with. Functionality can be built on and around a 3D model. Models can be manipulated, animated, and scaled. A photograph captures the light bouncing off of an object, that is closer to a description of the object.  A 3D model is a representation of the actual physical properties of the object, and that strikes at the nature of the object itself. This means that a 3D model can “stand in” for a real object in simulations, and the laws of physics can be applied accurately. This realistic depth and spatial presence can be very impactful to students. Much more so than a simple photograph.
  5. 3D models can be analyzed
    • Because 3D models are accurate, and because they occupy no physical space, they lend themselves to analysis techniques unavailable to the physical world. Two models can be literally laid on top of one another to highlight any differences. Measurements of structures can be taken with a few clicks. In the case of a machined part, material stress tests can be run over and over without the need to replace the part.

These are only a few of the ways that an educator could leverage 3D models. There are many more. So, if you still find 3D models interesting, you’re probably wondering how to get them, or where to look. There are a lot of places to find them, and a lot of techniques to build them yourself. I’ll outline a few.

Where do I get them?

3D models are available all over the internet, but there are a few reputable sources that you should definitely try first. Some will allow you to download models, and some will allow you to link to models on their site. Some will allow you to use the models for free, while others will require a fee. Some will have options for all of the aforementioned things.

How do I create them?

The two main ways to create 3D models are scanning and modeling.

Scanning can be prohibitively expensive, as the hardware can run from a few hundred dollars, to many thousands of dollars. But, like anything else technological, you get what you pay for. The quality is substantially better with higher-end scanners.

For something a little more consumer-grade, a technique called photogrammetry can be employed. This is a software solution that only requires you to take a large series of photographs. There is some nuance to the technique, but it can work well for those unable to spend thousands of dollars on a 3D scanner. Some examples of photogrammetry software include PhotoScan and COLMAP.

Modeling has a steep learning curve. There are many different software packages that allow you to create 3D models, and depending on your application, some will be better suited than others. If you are looking to create industrial schematics or architectural models, something likeFusion 360, AutoCad, or Solidworks might be a good choice. If you’re trying to sculpt an artistic vision, where the precise dimensions are less important, Maya, Blender, Mudbox or Zbrush may be your choice.

How to use them in your class:

There are a number of ways to use 3D models in your class. The simplest way is to link to the object on the website in which it resides. At OSU Ecampus, we use the site, SketchFab, to house our 3D scans. The source files stay with us as we create them, but we can easily upload them to SketchFab, brand them, and direct students to view them. SketchFab also allows us to add data to the model by way of written descriptions andannotations anchored to specific structures in the model.

The models hosted on SketchFab behave similarly to YouTube videos. You can embed them in your own site, and they are cross-platform compatible. They are even mobile-friendly.

As you can see, there is a lot to learn about 3D models and their application. Hopefully, I’ve broken it down into some smaller pieces that you can reasonably pursue on your own. At the very least, I hope that you have a better understanding of how powerful 3D models can be.

A big THANK YOU to Nick Harper, Multimedia Developer, Oregon State University Ecampus